Winter Dessert Treats

Michal Haines

I’m not a particularly dessert orientated person. If cheese was to miraculously appear on the table after dinner, I’ll be the first in but chocolate, sweets and puddings I am happy to pass up…unless its winter.

For some reason my body obviously has decided that on top of my already cosy layer of fat that just a little more would be helpful to keep the cold out.

Winter puddings with jugfuls of crème anglaise and scoops of ice-cream are just the thing to add that layer.

My mother whips such things up in a jiffy. One rather odd creation is a part sponge, part crumble creation, at the bottom of which is stewed fruit, all thick and jammy with sugar. I have learned to love these treats as she very rarely made them when I was a child but now seems to like treating my husband to them regularly. I think maybe she is trying to tell me something about good wifely duties. I come home regularly to find yet another trifle or half sponge, half crumble creation pushed through the cat door so far that I am afraid that maybe she has dislocated her shoulder to do so.

I have to go with the English and their pudding repertoire. They seem to have mastered  these squishy, baked treats. Whether it is the ingenious bread and butter pudding or the sticky date, they work after a good old roast or casserole.

My range of puddings and desserts is limited I have to admit and I am ok with that. As someone who entertains a lot, I focus on the entrée and main and hope by that the stage we reach dessert people have eaten more than enough to expect yet another course. I think that as I am a “throw a bit of this in and a bit of that” sort of a cook, things generally go badly when it comes to baking. So this means that my tried and true recipes are those that require little measuring and have quite a bit of room for messing about flavour and ingredient wise.

If I am feeling totally in the mood for ginger cake but I have a craving for tamarillos too, then my recipes have to be adaptable enough that I can do both.

I have found over the years that the best bakers and pudding makers are men.

Does this suggest that they are more precise with measuring or is it simply that the men I have conversed with on this fascinating subject just all happen to be that way inclined?
Either way, I have always been happy to leave them to it and allow them a little of the dinner party limelight as they pull fresh from the oven some heavenly wonder that awards them more accolades than the main I have slaved over for three days.

Is it that desserts and puddings appear more magical, more fantastical? Is it that childish sweet yearning in all of us that when pudding arrives, we all decide that we do have room for a little more….. can you make that slice a little bigger….?

No matter. I am secure enough in my talents that I can handle this devastating twist of the proverbial knife and accept that the pudding was delicious and yes I am sure that he will give you the recipe. Oh you don’t want the recipe for the main too? No, ok, I’ll make sure he emails it to you. I feel it would be petty at this stage to point out that it is a rather unsophisticated recipe taken from trashy weekly that someone left at his work.

I do make a pretty good crumble though and enjoy using the best of the seasons produce to do so. This time of year we have an abundance of great things to stew up. Apples, quince, feijoa and classic old rhubarb work so well with new season nuts like walnut, hazelnut and chestnuts. I like to be able to roughly grind the nuts up in the food processor so they act partially to help bind as well as give great texture and taste to the fruit.

The following three are my classics. They are fast and easy but still win the accolades.

Lemon Custard Pudding

Wonderfully old fashioned, this works so well after just about anything due to the tartness. A giant helping of cream is a must.

Serves 6

100g butter
175g soft brown sugar
4 eggs, separated
Juice of 3 lemons and zest of 2
Zest of 1 orange or go crazy and use a lime instead
50g plain flour
500ml milk
1 vanilla pod, split open and seeds removed and placed in the milk to infuse. (keep the pod for another use)

Grease an ovenproof dish of about 2 litre capacity and preheat the oven to 180 C.
Using an electric beater, cream the butter and sugar adding the citrus zest and juice as you go. Gradually beat in the egg yolks one at a time. Don’t worry of it looks as though the butter and sugar curdles a little. Just keep beating.
Beat in the flour and vanilla infused milk on a slow speed just till it has combined.
The end result will look nothing like a pudding or anything that could possibly work.

Clean off your beater attachments and dry them well. Beat the egg whites till they are peaks then fold into the lemon batter.

Pour the whole lot into your greased dish and place in a roasting dish. Fill the roasting dish with cold water so it comes half way up the side of the pudding dish.

Into the oven for 45 minutes or until the sponge has risen and there is a thick custard at the bottom. Serve immediately for ultimate accolades.

Sticky Date and Ginger Pudding

This is actually mine rather than my husband’s. I have been silly enough to add chocolate to tis already ludicrously decadent dessert. If you are brave enough, simply add your favourite chocolate broken up into the mix or add a handful of chocolate buttons.

Makes 8-10 single puddings depending on the size of your muffin trays.

370g dates, pitted
1 ¾ cups water
Freshly grated ginger to taste ( I use fresh rather than powdered to give a really bit hit of ginger. Use powdered if you prefer)
3 teaspoons baking soda

Place all the ingredients, except the baking soda, in a saucepan and bring to the boil. Take off the heat and stir through the baking soda. Allow to sit for 5 minutes.

95g butter
1 cup soft brown sugar
3 eggs
1 cup flour

Cream the butter and sugar. Add the eggs one a time, beating well.  Add the date mixture and then gently add the flour, adding a little more or less so the consistency is wet enough to drop off the spoon. If you need to add a little more liquid, add milk, folding gently. Add your chocolate if you like at this stage.
Grease a large sized Texas muffin tray well.
Spoon in the mix and place in a preheated 180 C oven for 15 minutes or until a skewer inserted into the centre of each muffin comes out clean.
Serve with ice cream or custard.

Rhubarb and Feijoa Cake

This is a great recipe as it is so quick and easy and will work with any fruit.
I don’t cook the rhubarb or feijoas at all so they remain quite tart and textural.

125g butter
1 ½ cup caster sugar
1 egg
1 cup sour cream
250g finely sliced rhubarb, skin removed
6 large feijoas, skin removed and diced
2 1/3 cups flour
2 teaspoons baking powder

Preheat the oven to 180 ◦C.
In a large bowl cream the butter and sugar till pale.
Add the egg and mix well.
Add the sour cream and fruits, mixing together with a spatula.
Sieve in the flour and baking powder, folding gently till just combined.
Tip into a well greased 22cm cake tin and bake for 35-40 minutes or until a skewer inserted in the centre comes out clean.
Serve with yoghurt or ice-cream.

Chocolate Self saucing pudding – as photographed

One Pot Creations

Michal Haines

I wonder if the French hated washing the dishes so much that they created the cassoulet.

I think maybe in Toulouse, the renown “Capital of Cassoulet” a couple’s argument over who would do the dishes went that little bit further than usual and this resulted in a decision to only ever cook in one single pot.

If you make a little investigation of stews or one pots in the world you do find that people everywhere are keen to avoid washing the dishes. Ireland, Germany, Spain, Mexico, Portugal, Poland, England, America, Japan……every corner of the globe has a version that they call their own.

I certainly appreciate the simplicity of the one pot. Wintery and warming, these are comfort dishes rich in flavour and dense in texture. Filled with the wintery goodness that the garden can offer, one pots definitely have that appeal of feeding many with ease, and in these hard times, on a budget. Naturally it doesn’t have to be all cheap sausages and tough meat. Perhaps it is the name of ‘one pot’ that congers up bad memories of childhood. Many people talk of the trauma of boiled cabbage with odd unidentifiable cuts of animal. But the one pot has come a long way from being something to be very suspicious of.  

When you think slow cooked, all of a sudden things taken on quite a different feeling. A little more gourmet even. Push that boundary a little further and we are talking about the robust and intriguing flavours of a complex Indian curry, a red wine rich coq au vin, a Chinese poached chicken with medicinal herbs. The one pot certainly doesn’t have to be dull.

 The background of the one pot only goes back to the early 18th century where pounded rice was added to meats and cooked very slowly in a large earthenware dish. The earthenware dish itself became known as a casserole and in turn we have created a type of dish, cooked in the oven.

Different to a stew only in the cooking process (heat that is applied to the bottom of a dish makes it a stew where as a casserole is cooked in the oven), the casserole really took a dive in 1970’s America when things just stared getting out of hand. Tuna casserole is still something you hear in the odd American sitcom and is purely canned soup combined with canned tuna. The thing of potluck dinners, the one pot had lost is glamour and allure.

The stew hasn’t really been doing much better. Since prehistoric times, the stew has been about feeding the masses.

Evidence shows the Amazonian tribes used turtle shells to cook in, and in the Bible we are told that Esau traded his inheritance with his twin brother Jacob for a meal of lentil stew. The Romans were fond of a good stew and we all now about the French and their cassoulet and ragout.

 Today we are lucky to be able to source all sorts of great ingredients. This makes for fantastic and interesting one pots to be coming out of your kitchen. Winter is very much the season of the one pot. The ease of cooking means you can remain huddles over the heater that little bit longer, have another glass of red wine while you wait and if you are really organised, either utilis your crock pot or cooked it all the night before for optimum flavour. We all know that a good stew or casserole tastes much better the next day so I try and get organised enough to cook it all the day before and then give it all a further hour of cooking once I get home at night. This will also mean you are not sitting about till ten pm waiting for your one pot.

 I am enjoying the fact that more and more you are able to taste great slow cooked creations at restaurants. No longer relegated just to the family table, wonderful versions of classics like Irish Beef Stew, Hungarian Goulash, Ratatouille and Ragout can be seen at high end restaurants created with the extra love and know how of talented chefs.

This certainly does not let you off the hook though. A good stew or casserole is still great family fare.

 Here are a few Tips for a great one pot-stew or casserole

Meat
* Use the correct cut. Slow cooking meats are generally cheaper cuts but do need the time and liquid to make them soft and tender rather than stringy and tough.
* Long slow cooking softens connective tissue and converts it from collagen to gelatine.
* Your best bet is to use shanks, shoulder (where two excellent stewing meats, brisket and flank, come from) and rump for slow cooking. The other way to do it is by price. Slow cooking meats will always be considerably cheaper than the other prime, marbled cuts that come from areas of the animal that are worked a lot through exercise. Look for the meats at the best prices for your slow cooking recipes.
* Cut your meat into even pieces so that they will cook at the same time.

Browning
To add flavour and colour, browning your meat first is recommended. You can get away with not browning for chicken, pork and veal but I still like to.

 Liquid
Whether you choose to use wine, stock or water, you need a good amount of it. Enough to cover is the best rule of thumb here.

 Time
Don’t rush the process. Most recipes will call for an hour at least or more at a lower temperature. I have cooked things for 5 or 6 hours at a really low temperature before but it is all about the time you have to spare. As suggested, you can cook something the night before and finish the cooking the following night to get the best flavour. A slow cooker or crock pot can be very beneficial for this.

 Additional Ingredients
It is all up to you but many recipes will call for a carrot, a few sticks of celery and an onion all finely chopped. This is always a good start for your slow cooked one pot. Some recipes may call for the addition of a secondary meat such as bacon for flavour. I like to add this at the start to really get the flavour in. Herbs and other flavourings need to be added at your discretion. I like to add some herbs at the start if they are woody enough to cope with the long cooking process. I then add some fresh right at the end so I still have that oily, bright taste.
I think half the key to a good one pot is being a little bit imaginative so you can bring out the best of whatever ingredients you decide should share the pot.

 Classic Beef One Pot

Goulash

The Hungarian Goulash is one of my favourite mid winter one pots. I like to add a few things to make it my own, but like all one pots, the sauce is what it is all about.
Traditionally made using Hungarian paprika, I use smoked Spanish paprika for extra flavour.

Serves 4

500g chuck or any slow cooking beef cut, cubed into 1cm portions
1 white onion, peeled and finely chopped
3 cloves garlic, peeled and finely chopped
2 tablespoons smoked Spanish sweet or bitter sweet paprika 
2 tablespoons plain flour
250g mushrooms, any variety of your choice, cleaned and sliced
Stock or water
Salt and pepper to taste
250g sour cream
100g black olives

 In a large heavy based pot, heat a little oil and brown the onion and garlic. Add the meat and brown well. Add the paprika, pepper and salt and mix well.
Sprinkle over the flour and allow to cook for 1 minute before adding enough stock or water to cover the meat.
Add the mushrooms and cover. Reduce the heat to a simmer and cook for 45 minutes.
Remove the lid and check for seasoning.
Add the olives and mix well.
Stir through the sour cream and bring back to a simmer.
Serve with rice or pasta.

Not so Classic One Pot

Chanko-Nabe

The Japanese have quite a repertoire of one pots. One is known as Chanko-Nabe and is eaten by sumo wrestlers. Consisting of broth, meat, and vegetables, the Nabe is very wintery and filling.

The base is miso and dashi, both of which can be easily purchased at some supermarkets or at speciality food stores and the pot can withstand anything you throw into it. There are versions for this dish with fish, chicken, salted vegetables….all sorts.

Traditionally served in one giant pot at the table over a gas burner to keep it hot, this is a great one to share with family and friends.

Serves 4

2 ½ teaspoons instant dashi flakes (bonito flakes)
500g very thinly sliced pork belly
3 tablespoons white miso
3 tablespoons red miso (or use 6 tablespoons or whatever miso you can find)
2 tablespoons mirin (sweet rice wine)
1 large waxy potato, peeled and sliced thinly
1 small daikon (white turnip), sliced finely
1 block firm tofu, cut into small cubes
1 bunch Chinese cabbage-any variety you like, washed and chopped roughly
2 dried shitake mushrooms

In a large pot, heat 10 cups of water with the dashi, miso and mirin.  
Add the shitake mushrooms and simmer covered for 20 minutes.
Remove the lid and add the pork, daikon, potato and tofu. Allow to simmer for a further 10-15 minutes.
Once the potato is cooked, add the cabbage and mix well.
Serve at the table with bowls of rice. 

 The Moroccan One Pot

Lamb and Apple Tagine

 The tagine is much the same as the cassoulet. It’s an earthenware dish rather than the name of a meal. The cooking process is the same but the conical shape of the tagine lid allows for moisture to rise and drip back into the dish allow for a rich flavour and moist tender meat. The thing I appreciate the most about the tagine is that through out Morocco they are not scared to go to town with fruit. The hot climate helps that but we can also make the most of the abundant autumn and winter fruits slow cooked with lamb.

Don’t be put of this recipe if you don’t have a tagine. A large heavy based pot with a lid will do the trick just as well.

Serves 4


500g diced lamb shoulder
2 red onions, peeled and finely chopped
5 cloves garlic, peeled and chopped finely
2 preserved lemons, rinsed well, flesh removed and discarded and flesh finely chopped
2 new season apples, chopped roughly
3 teaspoons ground cumin
3 teaspoons ground coriander
2 teaspoons ground cinnamon
1 teaspoon ground cloves or add 3 whole cloves
1 teaspoon ground ginger
Salt and pepper
2 tablespoons raisins

 In a large heavy based pot or tagine, heat a little oil and brown the onion and garlic.
Place the lamb in the pot and mix well before adding the preserved lemon, apple, all the spices, salt, pepper and raisins.
Place the lid on and reduce the heat to a simmer. Cook for 2 hours.
Remove the lid and check for seasoning and adjust as needed.
Serve with cous cous or rice.

 One Pot Bake

Baked Chowder

This is totally untraditional but really wintery and tasty.

Serves 4

 250g smoked fish, removed from the bone
12 fresh mussels, chopped roughly (feel free to use smoked here as it gives some good extra flavour)
2 fillets white firm fish such as ling or hapuka, cut into small cubes
150g bacon, chopped
3 sticks celery, finely chopped
2 white onions, peeled and finely chopped
25g butter
4 tablespoons plain flour
250ml milk
1 lemon, juiced and zested
3 boiled eggs, shelled and chopped into chunks
Fresh dill, chopped finely
Fresh Italian parsley, chopped finely

 In a large heavy based pot, heat a little oil and add the butter. Allow to melt then add the onions, bacon and celery.
Sprinkle in the plain flour and mix well. 
Slowly add the milk, mixing the flour well to form a paste. Keep mixing till all the milk has been added and you have a creamy sauce.
Add the fresh and smoked fish, the mussels, lemon juice and zest. Mix well.
Add the herbs and the egg, mixing all through gently.
Top with potato mash and grated cheese and place in a preheated 180C oven for 45-50 minutes.
Serve with crusty bread.

Autumn Eating – Root Vegetables

  Autumn Eating – Root Vegetables
Michal Haines

 The cold weather brings us an abundance of root vegetables and harvesting them young is a great way to enjoy them.

Root vegetables are somewhat overlooked. Maybe it is their rough exterior or cheap price but they seem to have fallen by the wayside in terms of being rated as highly nutritious store houses available right through the winter months when little else is.

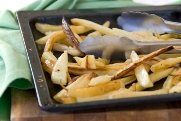
I love to sit down to a plate full of well roasted, ever so slightly crunchy baby carrots along with a perfectly roasted chicken.

 Roasting naturally increases the level of sweetness already found in these underground dwellers and in baby carrots and beetroots, the sweetness level is especially high.

Parsnips, swedes (Or as the Americans oddly call them, rutabagas and is in fact an accidental cross between a turnip and a cabbage) beetroot, carrots and turnips are all available in miniature sizes that need no cutting, very little trimming and just a wee bit of oil, salt and pepper to make them delicious.

All high in Vitamin C and low in sodium they are a wonderful addition to any diet.

Look for firm fresh produce and store carrots and beetroot in the fridge for up to a week. Turnips like to be stored with your potatoes somewhere cool and dark.

 A few quick cooking tips for perfect roasted vegetables

-trim only the stalks off baby beetroots and cook them unpeeled to minimise their colour leaching. The old trick of boiling beets whole, then peeling off the skin is a good one if you particularly want to get rid of the skin of larger, tougher beetroots.

 -just scrub rather than peel your baby vegetables. The larger they are the woodier they become so choose the right size for your needs and peel accordingly.

 -don’t crowd your root vegetables when roasting them. Allow them plenty of room to crisp up at the edges

 -don’t discard those beautifully coloured leaves from the beetroot and turnip tops. They can be stir-fried with garlic and finished with a squeeze of lemon for delicious winter greens that work well with shredded red cabbage.

 At this time of year other underground delights start arriving at the market such as Jerusalem artichokes and new season potatoes. The abundance of other autumn vegetables and produce to mix with your root vegetables is plentiful. Pumpkins and squash, fennel, mushrooms, pears, walnuts, radicchio, apples….. The autumn table is a delightfully flavoured and eye catching place.  
One of my absolute favourite autumn recipes is Creamy Roasted Parsnip Soup.Using the finest and freshest parsnips is the key for that wonderful sweetness that works so well with woody spices such as cumin and coriander. If you are short of time or energy, skip the roasting part and place all the ingredients in to a saucepan and simmer gently till softened.


Creamy Roasted Parsnip Soup.

1 kg parsnips, peeled and cut into quarters
2 white onions, peeled and quartered
1 head of garlic, top sliced off to expose the flesh inside
600ml chicken or vegetable stock
4 teaspoon coriander seed, toasted and freshly ground
4 teaspoons cumin seed, toasted and freshly ground
¼ freshly grated whole nutmeg
200ml cream
Salt and pepper to taste

Preheat oven to 200 C.
Place the parsnips, onions and garlic head in a large roasting tray with a little oil, salt and pepper.
Roast for 20 minutes or till the parsnip is just beginning to soften. Remove from the oven and allow to cool enough to squeeze the garlic from its skin.
In a large saucepan, heat a little more oil and add the cumin and coriander. Allow to cook for 30 seconds before adding the stock.
Add the parsnip, onion and garlic and bring to a simmer for 15 minutes or until the parsnip has totally softened.
Using a stick blender, blend the parsnip, onion and garlic to a lovely thick consistency. (This could also be done in a food processor and returned to the sauce pan)
Add the cream and blend once again.
Return to a simmer and check seasoning. Adjust as needed.
Serve in large bowls with pita or Turkish bread and piles of homemade hummus.

Green Kiwifruit – cheaper than chips

Green kiwifruit – cheaper than chips 

Marion Farrell

If there’s one food that’s going against the tide of rising food costs – it’s our green Kiwifruit. I spotted them at my local supermarket for just 89c the other day, that’s the cheapest they’ve been in a long time, and this is thanks in part to the global economic crisis and decreasing international demand.

There are some 500,000 trays of the fruit more than usual for the local market – so what are we to do with them?

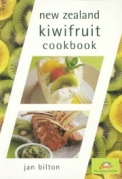
One person who I knew would be pleased to hear this and is positively brimming with recipes is Jan Bilton – a Kiwifruit crusader who has long extolled the virtues of the furry little brown fruit. Since writing ‘The Kiwifruit Cookbook’ which contains over 100 recipes, she can’t fathom why we don’t utilize this nutrient dense, versatile, zesty and delicious-tasting fruit more widely in our cooking.

Now is the perfect time to bottle, bake and blend with Kiwifruit according to Jan. “It gives everyone the opportunity to make their chutneys and pickles – it’s great to be able to use them (kiwifruit) in these ways.”

Pavlova topping and platter adornment aside, Jan tells me that kiwifruit “gives tang” to pasta salads, goes well with our favourite foods: mussels, lamb, salmon and venison as it “helps to counteract the richness and adds piquancy”,  and makes a nice alternative to apple in muffins. It’s a case of move over apples for the Kiwifruit advocate, who adds, “A kiwifruit a day will keep the Doctor away”.

Here are a couple of recipes courtesy of Jan – I’m looking forward to giving the muffins a go this weekend…

kiwi muffins


1/2 cup sugar

2 cups flour

2 1/2 teaspoons each: baking powder, custard powder

1 egg, lightly beaten

1/2 cup milk

100g butter, melted

3 kiwifruit, peeled and diced


Preheat the oven to 200°C. Lightly grease an 8-hole muffin pan.


Place the sugar, sifted flour, baking powder and custard powder into a bowl. Combine the egg, milk and melted butter. Add the liquid ingredients and diced kiwifruit to the dry ingredients and combine quickly, until just moistened.


Spoon into the prepared muffin pan. Bake for 15-20 minutes or until a skewer inserted in the centre comes out clean. Makes 8.


kiwifruit & lychee jam


The lychees are optional but they do add a point of difference.


1kg kiwifruit, peeled and mashed

juice 1 lemon

1/4 cup water

4 cups sugar

450g can lychees, drained


Place the kiwifruit in a saucepan with the lemon juice and water. Tie the juiced lemon halves and pips in muslin and add to the pan. Slowly bring to boiling point, stirring occasionally. Simmer until the fruit is soft.


Add the sugar and stir, until dissolved. Add the halved lychees (if using). Boil briskly, until setting point is reached, 104°C. Remove the muslin bag. Pour into hot, clean jars and seal. Makes about 6 cups.


We have 5 copies of The Kiwifruit Cookbook to giveaway. Email [email protected] with Kiwifruit in the subject line to enter.

Cooking with Persimmon

Autumn Eating – Cooking with Persimmon
Michal Haines

 First Cultivated way back in the eighth century by the Japanese, the persimmon had long been an autumnal delight in China.

Resembling a glowing lantern, the leaves of the persimmon mimics its fruit by changing in colour, as the cold progresses, to a golden orange. It is a shame that this rather unique fruit is not more commonly enjoyed and as eagerly anticipated as other autumn fruits.

With delicate overtones of honey and apricot, the persimmon can be slow to ripen, taking anywhere from five days to two weeks to reach the point where the astringent tannins have turned into sweet sugars.

The two most common varieties that we see are the fugu and the haciya.

The haciya is an older variety and easily identifiable due to its acorn shape. Eaten only when totally ripe it has a soft, almost jelly like texture. The fugu has a flatter base and is more commonly seen, likely because it stores better and can be eaten when it is still firm. The less astringent flavour and crunchy texture makes it great for serving fresh in salads over the early autumn period.

Look for fruits that are bright in colour, firm (as you can ripen them easily at home) and without markings that may indicate damage. It is more likely that any persimmons that you see will be the firmer fugu variety so buy them when they still have some ripening to do so you have the choice of when to eat them.

New Zealand is a rather large exporter of persimmon straight back to the places they originally came from, with a mere 2500 tonnes moving off shore in 2002. They do fall about sixth on the list of international persimmon growers.

Gisborne is our biggest grower followed closely by North and South Auckland, Northland, Hawkes Bay and Bay of Plenty.

The Persimmon Industry Council has much to say on the value of persimmons as they are high in vitamin C, iron and calcium and they also recommend that unlike many other fruits, your best storage is at room temperature rather than chilled.

The Koreans, Chinese, Japanese and Vietnamese all dry the persimmon to create rather delicious leather and it is enjoyed simply as a sweet or used in other cooking applications. The Koreans take it one step further and make an alcohol infused with the flavour of dried persimmon and a vinegar enjoyed for its health benefits.

The leaves of the tree are used in Korea and some areas of Manchuria for tea.

 Persimmon works very well with citrus and should not be overlooked as a fantastic autumn fruit that can be combined with all sorts of cold day delights from desserts, fruit pastes, drinks, purees, sauces to sorbets and ice creams.

The following are a few recipes that I have played with over the years that put persimmon at the forefront of autumn fruits.

Cooking with Persimmon


Everyone has quince paste with their blue cheese-why not persimmon paste instead. Works very well with goat’s and sheep’s milk cheeses.

Persimmon Paste

Slice a kilo of persimmons into quarters and place in a heavy based saucepan.

Add the zest and juice of 1 large lemon and add ½ cup of water.

Bring to the boil and reduce the heat and allow to simmer for 20 -25 minutes or until the persimmons are soft.

Remove from the heat and puree in a food processor to a smooth paste.

Return the puree in the saucepan and add the sugar, stirring over a medium heat until the sugar dissolves.

Continue to cook over a low heat, stirring regularly (try a long handled wooden spoon as the mix can spit) until the puree thickens and comes away from the base of the pan.

 Pour into a shallow tray lined with non stick paper and spread to a thickness of about 12mm.

Allow to cool.

You can leave it dry out over a period of a few days but it will remain a little stickier than quince paste.

Store between layers of non stick paper in an airtight container.

 Autumn Salad

Fresh new season walnuts combined with roasted root vegetables and roasted slices of persimmon.

Peel and slice 6 persimmons into eighths.

Place in an oven tray with a drizzle of sherry vinegar, a sprinkle of brown sugar and a little oil.

Bake for 10-15 minutes or just as the sugars are caramelizing.

Serve mixed through the roasted root vegetables with roasted walnuts and a good helping of salad leaves.

Dress with walnut or hazelnut oil and a little more sherry vinegar.

 Roasted duck and pork are fantastic with persimmon.

Try roasting persimmons as for the autumn salad and serving alongside the meats. A traditional apple sauce can be spiked with persimmon puree for a richer, brighter flavour or serve a persimmon aioli with roasted pork and duck.

Persimmon Aioli

Whisk 2 free range egg yolks in a bowl or mortar and pestle with a pinch of salt

Whisk in 2 teaspoons persimmon paste or 1 roasted persimmon, well pureed and the juice of half a lime.

Slowly pour in a very thin stream ½ cup of olive or grapeseed oil, whisking all the time.

Taste and adjust seasoning as needed.

Chill till needed

 Cured meats, with their salty taste and leathery texture, are a wonderfully different accompaniment to persimmon. One of my favourites is an easy and really tasty finger food.

Persimmon Salsa

Peel and very finely chopped 2 persimmons, 1 shallot and 1 pear

Toast and very finely chop 2 tablespoons hazelnuts

1 teaspoon toasted and freshly ground coriander seed 

Add the juice of 1 lemon

Season with pepper and salt and mix through a little olive oil to lubricate.

Mix well and allow to sit for up to 1 hour for the flavours to infuse

Lay out very finely sliced pieces of smoked pork, venison or beef and top with the persimmon salsa.

Serve with a dry sherry.

 Persimmon Pesto

The salsa can also be all thrown into a food processor and pulsed to create a texture more like a pesto. Add around about ½ cup of toasted hazelnuts, walnuts or chestnuts to achieve a rougher mix ideal for spreading onto rye bread to accompany cured meats.

 Autumn Fruit Salad

The abundance of incredible fruits over autumn means fruit salad is mandatory.

Think fresh feijoa, freshly sliced persimmon, fresh guava and poached quince and apple combined together in a little poaching syrup and drizzled with good quality honey.

 Apple and Persimmon Tart

Use any autumn fruit for this very quick cheats dessert that can be done ahead of time and then reheated as needed.


3 persimmons cut into eighths

3 new season apples cut into eighths

Place the fruit in a saucepan and add ¼ water and ¼ cup sugar.

Mix well and place on the heat and cook on a medium heat for 15 minutes

Remove from the heat and allow to cool, pouring off all excess liquid

Preheat oven to 200 C.

Grease an oven tray and lay out a single piece of pre rolled puff pastry.

Sprinkle over 2 teaspoons ground almonds

Top ground almond with a layer of apples and persimmon

Sprinkle over another 2 teaspoons of ground almonds

Take a second sheet of puff pastry sheet and cut into 2 cm wide strips.

Place the strips artfully over the fruit and seal the edges down using your fingers.

Brush over with milk and bake for 20-25 minutes till golden brown.

Serve with vanilla ice cream or whipped cream

Persimmon Image taken from http://www.teara.govt.nz

Check out persimmons on what’s for lunch honey blog

Mother’s Day Gift Ideas

Mother’s Day Gift Ideas
Marion Farrell

When it comes to buying presents I usually turn to edible goodies, the never fail to please option. I mean, who wouldn’t be pleased to receive a box of chocolates or a good bottle of wine?

With Mother’s Day mere days away I’ve trawled the net in search of Mother’s Day gift ideas for the last minute shopper: some novel and most just plain delicious – I hope you find them helpful. 

1.     1.RAJASTHAN – How to Eat Rose Petals and Silver Paper’ – Book Mum a place on this highly informative and entertaining one-day class hosted by the one and only Peta Mathias. The colourful TV presenter, culinary queen and intrepid traveller will share her love of Rajasthan (Land of Kings) in Northern India for its sheer vibrancy and of course, the delectable food.

Peta relished exploring foods with centuries of history, like the vegetarian dishes of Hindu Raja, the opulence of Murghal cuisine, cereals and chillies (to appease hunger) from nomadic desert tribes. She was entranced by the range of breads, rice dishes, fruits, vegetables and learning the subtleties of spices. Now she cannot wait to share her enthusiasm and skills with a local twist for intrepid food- lovers. Cost $210. To book a place see www.ruthpretty.co.nz and go to ‘Cooking School’.


 2.  A gift hamper from ‘foodie’ store Sabato is a great way to treat your Mum to extra-special artisan products. I’ve chosen to feature ‘Morning Glory’ for its affordability factor. At $80 it’s the store’s best buy hamper. This pack is ideal for the Mums out there who savour all things breakfast and it contains a jar of luxury Sicilian blood orange marmellata, a packet of Ines Rosales handmade tortas, Allpress coffee, a bottle of rich Alain Milliat nectar and two tins of Harney & Sons fine teas. Note too, Sabato sell gift vouchers, starting at $10 – this will allow Mum to select from an extensive array of mostly European and local foodstuffs.  Also check out Wellington Truffle for their gift vouchers.


3. Inject a fun element to the day by surprising Mum with an outing. Tell her to get dressed up and you’ll pick her up and treat her to a memorable afternoon filled with entertainment and the most elegant afternoon tea, that is, High Tea at The Langham. The 5-Star hotel is current title-holder of Auckland’s best High Tea as rated by Metro magazine and serves its guests with the traditional three-tiered afternoon tea complete with sandwiches, scones and dainty cakes in its Rangitoto Ballroom.  What’s more Sunday 10 May also promises a Jazz band and guest speaker Nerida Cortese will share her thoughts on motherhood.

Tickets are $55 per person. Children under 12 years old are half price and children under five years are free. Reservations are essential and can be made by phoning   09 300 2809   [email protected]

4. For those who are looking for a recession-friendly gift that comes in under $15 – how about one of these French tea towels ($7.50 each) from Milly’s Kitchen that will add a touch of je ne sais quoi to Mum’s kitchen – hide a bar of Valrhona (available at Sabato and Mercato Christchurch) which is considered to be the Rolls-Royce of chocolate and is favoured by Michelin star chefs ($2.90) within for a special touch.

Sabato – 57 Normanby Rd, Mt Eden & Milly’s Kitchen 273 Ponsonby Rd
Mercato – 1-5 Cass St, Sydenham, Christchurch

5. Take a look at www.cookthebooks.co.nz – an online bookstore that’s dedicated to cook books to choose a useful tome for Mum. I like the look of Joanne Glynn’s ‘Slow Cooking’ especially as this form of cooking is best appreciated during the cooler months. Mum’s bound to find something inspirational in this collection of traditional and modern recipes, including starters, oven-baked meals, stovetop stews, side dishes and luscious sweets. $45.

6.  Musical mums are sure to enjoy listening to Dame Malvina Major and the Christchurch City Choir in Christchurch this mothers day.

What do you have in mind for mum and or are there any special events on in your areaa that you would like to share?

Your Recipe Requests

Readers Recipe Requests

Often we go to a Cafe or Restaurant and taste something positively delicious that we would like to make at home.
If you have a recipe request that you would like then email me [email protected] with as much information as possible and I will do my best to get it for you. 

 Maddie requested this Indonesian Rice Salad from Capers, Epicurean Cafe 1181 Eruera St in Rotorua.  Thanks to Amanda for sharing the recipe.

INDONESIAN RICE SALAD
2 cups brown rice, cooked
1 cup roasted peanuts
1 cup currants
1/3 cup poppy seeds
2 cups cooked kidney beans
1/4 cup sultanas
1/2 cup sunflower seeds, toasted
1/3 cup sesame seeds, toasted
3 stalks celery, finely chopped
2 capsicums, diced
1/2 cup choped parsley

Mix all ingredients together and pour over dressing.

DRESSING:
1 cup oil
1/2 cup raisins
1 cup cider vinegar
juice of 1 lemon
1 dessertspoon curry powde                     

Heat oil, add curry powder and sizzle for no longer than 1 minute. Pour in cider vinegar slowly, add raisins, bring to the boil and simmer for 5 minutes. Remove from heat, add lemon juice allow to cool and blend in processor until smooth.


Gala Café in Mt Eden, Auckland make the best blueberry and lemon curd scones. 
They are really happy to share this recipe – I myself made them and agree they are delicious.

Helen

Gala Café G08 / 23 Edwin St Mt Eden Auckland


Blueberry, Lemon Curd Scones

 800g (6 cups) flour
6 tsp baking powder
3 tbsp sugar
300g butter
400ml milk
1 tbsp cold water
1/2 cup lemon curd
1 ½ cups blueberries (can use frozen)
2 cups icing sugar
1 tsp vanilla extract

 Preheat oven to 210 C.  Sift flour, baking powder and sugar into a large bowl and rub in butter until mixture resembles coarse breadcrumbs.
Make a well in the centre and pour in milk and water, mixing quickly with a knife to make a soft dough. 
Turn dough out onto a lightly floured surface and roll into a rectangle 40 x 50cm.  Cut rectangle in half. 
Spread one surface with lemon curd and sprinkle with blueberries, place the second half on top.  Cut into 15 pieces and place on a cold baking tray. 
Bake for 12-15 minutes until golden.
Mix icing sugar, vanilla and enough water to make a firm icing.  Ice scones when slightly warm.

 Maryloo asked for Apricot Coconut Slice from Robert Harris in Fielding.
Milton Thomas, owner was more than happy to provide this recipe that I have amended to suit a domestic kitchen.


Robert Harris Apricot Coconut Slice (adapted by Helen)

1 1/2 sheets sweet shortcrust pastry
400g can peaches, drained and chopped
1/4 cup passionfruit pulp
3/4 cup chopped dried apricots
3/4 cup walnuts, roughly chopped
3/4 cup sultanas
150g butter
3/4 cup sugar
2 eggs
1 tsp vanilla extract
2 cups coconut

Preheat oven to 180 C.  Line a slice pan with pastry and bake blind for 15 minutes.  Remove weights and cook a further 5-10 minutes until golden and firm to touch.  Allow to cool. 
Mix peach, passionfruit and apricots together, then spread over the cooled base.
Evenly sprinkle walnuts and sultanas over the fruit.
For the topping, mix together the butter (Softened, not melted) white sugar & vanilla in a bowl and microwave for 5 mins;
Mix in eggs and coconut and spread over middle ingredients;
Bake for 30 minutes until the top is golden brown


Farming Old Breed Farm Animals in Ngaruawahia

Farming Old Breed Farm Animals in Ngaruawahia
Marion Farrell

It had been a few years since I last visited Jonathan and Sarah Walker of Soggy Bottom Farm to see their rare breed pigs, cows and sheep and knowing what an innovative and hard-working couple they are I was eagerly anticipating hearing about new projects and seeing many more animals.

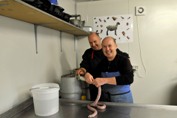
Three years ago the couple who hail from Britain, turned a hobby – rare breeds farming – into a business plan.  Not more than a year before this they bought 60 acres of rough, hilly farmland with a boggy valley (hence the farm’s name) west of Ngaruawahia where they introduced Belted Galloway cattle, Wiltshire Horn sheep and a few Tamworth and Wessex Saddleback pigs.  Within a year the Walkers had more livestock than their dinner table and freezer could cope with, and with the advent of the Hamilton Farmers’ Market decided to send some of the animals off to market as steak, sausages, ham and bacon – all made by Jonathan – a largely self-taught butcher.

More recently, it was great to catch up with Jonathan to find that their enthusiasm for an environmentally sustainable business is as strong as ever and that they continue to practice organic farming methods. “You’ve got to love it, because it’s more than a hobby for us. It is a lifestyle. People have no idea how much work is involved.” What’s more, they simultaneously manage to fit other professional commitments into their lives: Sarah is a specialist nurse; Jonathan runs a mobile saw-milling business and they are parents to two boys Finn, 13, and Mallory, 10.

Their decision to farm old breed animals has paid off – the animals are happy and healthy. “Older breeds work better in a practical sense – they work well in an outdoor set-up and adapt to rugged land,” says Jonathan. For a townie like me, it’s heart-warming to see the animals fossicking about outdoors. We seem to hear – all too often – about cases of neglect, animals confined to ridiculously small cages and the like. As for the meat: “It just tastes better. It’s firmer and has better texture than that of conventionally farmed,” he says.

Soggy Bottom meat is additive free, in fact their purpose-built butchery, located on the farm, is in the final stages of receiving full organic certification. While I expected to see greater numbers of livestock, numbers are modest: 12 pigs, 25 cows and 30 sheep, which means there is plenty of room for them to roam, intensive farming this is not. The couple has contracted two farmers to grow animals remotely who follow strict organic guidelines to ensure they can keep up with a steadily growing demand. “We have loads of regular customers and a number of new ones who actively seek our meat out through word-of-mouth”.

Right from the outset sausages were on the menu, as were bacon and ham. All their bacon is dry cured for one week for a greater intensity of flavour and beef is aged for up to three weeks this makes for a full-bodied flavour and optimal tenderness. I’m told that the best sellers are Cumberland sausages – a classic British variety made with roughly chopped pork and lots of pepper that are coiled rather than linked. “We can’t keep up with demand for bacon and black pudding.” He has also added some more sophisticated items to the Soggy Bottom repertoire – one being the Italian cured ham: prosciutto, salami and gourmet beef burger patties. With such a high quality product I was not surprised to hear that their fellow market stall holders exchange items such as cheese, bread and vegetables with the Walkers’ produce making them almost completely self-sufficient, a goal they have strived for from the beginning.

As for the future it’s about fine-tuning the running of the farm for more family time: “I don’t want it to get too much bigger. I just want to keep the quality really high and make a living from it,” he says.

For meat lovers who would like to learn the art of making sausages and/or how to cure and smoke bacon and make ham and salami – Jonathan takes one day courses. For more information contact: [email protected] or ph: 07 824 8383

Soggy Bottom trades at the Cambridge Farmers’ Market on Saturday mornings, Victoria Square and at the Hamilton Farmers’ Market every Sunday morning, cnr of Tristram and Collingwood Streets.

Pumpkin and Squash

a>Autumn Eating

Pumpkin and Squash


Magical jack-o-lanterns, coaches for princesses to be and perches for goblins-the pumpkin is much like the mushroom in the way that they have a fairy tale air about them.

These New World natives must have been quite a thrill to come across.

A thick skinned giant sitting about in the field long after their leaves have wilted, the pumpkin enjoys the autumn sunshine but not the winter’s cold.

 Truly incorporated into the world’s cuisines, pumpkin just became a normal part of what was happening in the kitchen. It is almost as if everyone decided that pumpkin needed no introduction to their cuisines-no need for the creation of new dishes-just a straight incorporation as if it had been there all along.

Soups and stews glowed with the golden flesh of pumpkin, dumplings halved revealed the saffron colouring, and many delighted in the addition of cream and garlic to this autumn vegetable-roasting it whole filled with cream to create a giant bowl of wonderful mush.

Back in its homeland it was coupled with sweet corn, haricot beans and chilli and generally roasted or boiled.


Obviously everyone was just happy to enjoy the easy going nature of pumpkin. Tasty but not over powering, a great addition to just about anything and the colour that adds something special at the table.


For most people a pumpkin is a pumpkin and squash is just an odd name. We don’t generally see much signage about stores on different varieties, shapes and colours which is a shame in my mind. Like all things, variety is the spice of life and different pumpkins and squash certainly have different traits.

As great breeders, pumpkins have been generous in providing us with a great deal of cross breeds. Weird shapes, sizes and colours make them a dazzling display but can be more confusing than just the standard grey crown pumpkin for people. The good thing with pumpkins is that they are all interchangeable so don’t be too worried.

For basic rule of thumb, the softer skinned tender flesh varieties such as acorn, onion and spaghetti squash are best for soups, boiling and sauces heavy with cream.

Harder skinned varieties such as crown, pumpkin and butternut make the best pie fillings, great stuffing for pasta sheets and roast perfectly to a caramel gloop. These are also the ones that are great keepers and many a housewife’s manual will tell you that squash stored in the winter shed with the stalk still attached will keep well till spring.


Said to be high in fibre with plenty of minerals and vitamins and having as much beta-carotene as carrots, they are good for you too.

Certain varieties are said to reduce heart disease, premature aging and cancer.

Growing them is easy and by being a little clever with limited space, such as over roofs and up walls, makes them ideal for city gardens .


Pumpkin and Squash enjoy the company of spices, garlic, and herbs, eggs, dairy and nuts.

They can go into the world of pasta, through rice, soups, do the Thai thing, the Italian thing, even the Turks love it candied and served with rose water.

It is a versatile gourd that shouldn’t be overlooked as a great addition to the vegetable store.


Pumpkin and Quinoa Cakes

Mixing the best of the New World with the spices of the Silk Road, this is an easy and yummy vegetarian recipe that can be served as finger food with a dipping sauce, as a falafel in pita bread or served up with an autumnal vegetable salad.


200g quinoa, cooked and rinsed well and left to drain

1 small pumpkin or half a large pumpkin such as crown or kobocha, peeled and roasted till very soft

3 cloves garlic

2 teaspoons freshly ground garam masala

1 teaspoon black mustard seeds

2 teaspoon freshly ground coriander

Salt and pepper

1 handful fresh coriander leaves, chopped

Juice of 1 lemon


In a large bowl mix all the ingredients together .Use your fingers or a fork to squeeze the pumpkin into a mash .I like to leave some lumps for interesting texture.

Preheat oven to 200 C.

Make balls of the mixture and pat down flat to about 2.5 cm diameter.

Place them on a well greased oven tray and place them in the oven for up to 40 minutes.

You will need to turn them at least once to get both sides brown and crisp.

I turn them after around 15 minutes and then keep turning if they need it to get both sides the same.


Serve with a yoghurt dip of plain unsweetened yoghurt mixed with 2 teaspoons of pomegranate molasses (available at good food stores), more fresh coriander and a little sumac or lemon juice.

Autumn Mushrooms


Land of the Gnomes-Autumn Mushrooms
Michal Haines

 The mushroom is an odd affair. Neither fruit nor vegetable, they shy away from the light only to make an appearance when the exact moisture and temperature levels are to their liking. With over eighty varieties displaying some of the most bizarre attributes, colours and shapes, they have decided to only allow us a few of their breed to domesticate. Unlike many other shameless plants, many mushroom varieties just will not be breed in altered conditions for mass growing. It is an attitude I admire.

An architects dream, the mushroom is also an unusual beauty queen in the kitchen. I always have to take a moment before I cut them to appreciate the fine, intricate gills under their cap, their velvet like skin and remarkable texture.

 Mushrooms aren’t just summery. They are, in my mind, all about wet, cold and damp. Sort of like a teenage boy, they appreciate being left alone in the dark to fester. They need to be enjoyed when the rain is falling, the heater is on and the possibility of a good movie is on the cards.

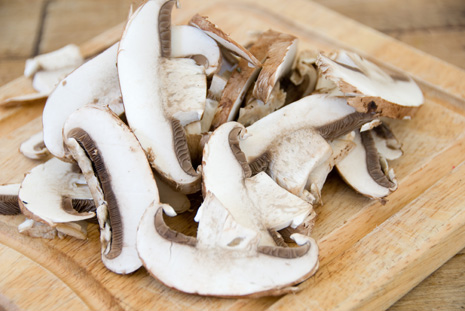
 It seems a shame that with so many varieties available we tend to only see the boring old button and larger flat portabello mushrooms. Widely available, they were the varieties selected for mass cultivation due to the ease with which they grow. You can even grow them yourself at home in a bucket!

If you are not like my mother, who was quite happy to harvest the mushrooms that popped up on our lawn, then hunting out some interesting ones will bring something new to the experience of mushrooms on toast this weekend.

 Selecting good quality mushrooms is a fine place to start.

A good friend of simple ingredients such as black pepper and cream, cheese, pasta and rice, they can have a robust flavour that is so unlike anything else.

The white button mushroom has a good shelf life. They stay nice and crunchy for a reasonable amount of time and keep their white caps right until they are about to disintegrate. Look for firm, unmarked caps, and nice stems that show no signs of dampness.

Portobello are the same. Look for those without damaged edges, nice colour and certainly not any that look like they are drying out around the edges.

Storage is best in paper bags rather than plastic as they like to have some air flow about them. In the plastic they sweat and get that rather awful smell about them that has been described as all sorts of interesting delights not commonly seen in many fridges.  

The golden rule is not to wash your mushrooms. By washing them you are adding extra moisture that will need to be cooked off before the mushroom itself starts cooking. Just wipe them down, removing any visible dirt and woody fibres and gently trim the stem if needed.

 There is a great selection of more interesting funghi available now and they are definitely worth some experimentation. Higher priced due to smaller quantities being cultivated, they need to be more delicately handled than your stock standard button and Portobello. What I love about them is they all have very different flavours and textures that can make a dish that little bit more exciting.

Enoki are the miniatures of the mushroom world. Having the smallest caps of all mushrooms, they look like a group of spore mould, with long stems, tiny pin prick hats and are stark white with darker, almost golden coloured stems at their base. They are very delicate in taste and need very little or no cooking. Best added right at the end of the cooking time and can be used as the ultimate in mushroom garnish. Cut off the clump at the base that holds them all together and gently fan them out to individual mushroom strands. As these little needles brown very quickly, they are the only variety I would suggest storing in cling film to keep their whiteness just a little longer. Fresh is definitely best for this variety.

 Oyster are another mushroom like Enoki that is prized for its appearance and texture rather than taste. Stunningly beautiful fans, white on the underside with a blush of grey on top of their caps, they are also best added right at the end of your cooking time or eaten raw. Trim the clump that holds them together at the base to serve and store in paper.

 Wood-ear and Honey Comb fungus are both very delicious but a little scary to those who haven’t seen them before. Wood-ear is easily identified as looking like a piece of dark brown leather.

A little trimming is needed to remove the base, and then it can be cut as required. I am a huge fan of this one stir-fried as it has a great crunchy texture.

The honeycomb looks more like something from the sea rather than the land. A fine network of intricate tunnels, it is also crunchy in texture that is best cut into bite size pieces and added to stir fries and soups.

Interestingly the Chinese are into these ones in a big way and both can be purchased dried from any Asian supermarket for next to nothing. They need to be re-hydrated in cold water for around an hour, squeezed out and cut as needed.

Classically Asian, the shitake is cultivated in mass numbers through out Asia and locally. As a fresh mushroom they are enjoyed for their meaty texture and a slight smoky, woody flavour. As a dried mushroom they really come into their own with intense, woody flavours and great chewy texture. An absolute necessity in my kitchen, they can take a very simple meal to a higher level with their flavoursome intensity.

For fresh mushrooms, look for those with creamy light brown caps and body with a full, undamaged appearance. They can get rather slimy quickly so store once again in paper.

For dried look for larger sized mushrooms with light brown and cream caps. The darker and smaller the caps, the lower the grade. These lower grades will still be fine for chopping up finely to add flavour but they do lack the subtlety in flavour of the higher grade as well as a better chewy texture. Lower grades can be very dry and can even remain tough after lengthy re-hydrating.

 The Asians were not the only ones to have truly appreciated the versatility of mushrooms. The French and Italians certainly had no trouble in revealing the magic of the truffle, the porcini or cep and the oddly gnome like nature of the morel mushroom.

Porcini, meaning little pig in Italian, is also known to the French as Cep. Totally wild, they can be seen fresh in late Summer and early Autumn but it is their dried format that is more common here in New Zealand. Grading can make all the difference here and you will find all sorts from little, mean looking chunks through to gorgeous slices of whole mushroom. The flavour of porcini is extremely meaty and any typical kiwi bloke would be happy chowing down on a porcini risotto for this reason. Wonderful added to a simple dish such as risotto or Bolognese, they add a meaty extra dimension.


A few pointers with porcini will help you use them wisely as they are expensive.

Firstly, a few go a long way so I only use maybe six pieces for a single quite flavoured dish and maybe ten for a mushroom risotto using a mixture of varieties.

Re-hydrate them for a good twenty to thirty minutes in warm water and use this stock in your meal. It is full off flavour. You will always have a few odd gritty bits and even small stones in your soaking water so I recommend discarding the last little bit of liquid.

I like to chop them up finely as a large hunk in a dish can be overwhelming. This also means that you can get away with using a lot less of them.

Keep them somewhere dark and cool and check them for bugs as they are delicious to them also.

Look of those that don’t have any small suspicious bug holes or chunks out of them, lighter in colour and well sized.

Porcini powder is also very useful and much less expensive. Add to soups, stocks and stews or sauces. Look for one that is nice and fine in texture otherwise your dish can be ruined.
Morels look like they are subdivisions for gnomes.  Oddly shaped like little conical hats and covered in a fine network of spores, the cap comes down over the body of the mushroom itself. Expensive and hard to come by they have a rich smoky flavour that incorporates the very essence of the forest floor. Again a little goes a long way and this is were the dried mushroom comes into its own as a cheaper way to sample and experiment.

 The same rules apply here when looking for dried. Good whole mushrooms of a good even colour and very little or no dust in the packet.

 The colder weather is on its way so enjoy the meaty delights of the forest floor as fresh as possible in any number of amazing creations.

Risotto is my favourite I think and I like to use a mixture of dried and fresh mushrooms of all shapes and sizes. While I am led to believe that mushrooms are full of vitamins and minerals, I wonder if that is cancelled out by the lashings of parmesan I put on top and the bottle of wine I have used in my stock.

 Mushroom Risotto

Serves 4

30g butter
1 brown onion, peeled and chopped finely
1 stick celery, trimmed and chopped finely
6 cloves garlic, peeled and chopped finely 
250g Arborio rice
1.5 litre chicken stock, keep hot
12 white button mushrooms, sliced
4 portabello mushrooms, sliced
8 porcini mushrooms, re-hydrated in cold water for 30 minutes
8 morels, re-hydrated in cold water for 30 minutes
1 honey comb mushroom, base trimmed and cut into bite size chunks

To serve
15g butter
A pile of freshly shaved parmesan
Italian parsley, well chopped
1 lemon, zested

Melt the butter in a heavy based, deep pan.
Add the onions, celery and garlic. Cook for 2 -3 minutes on a low heat.
Add the button mushrooms, portabello, porcini and ceps, reserving the rehydrating water and mix well. Cook for 3-4 minutes till any excess liquid has been cooked away.
Add the rice and mix well allowing the rice to be toasted slightly.
Add a ladle full of hot chicken stock and stir well, gently massaging the starch from the rice. Add a second ladle and again mix well, reducing the heat to a simmer. Add the mushroom soaking water at any stage during the cooking process for more flavour.
As the liquid disappears, add another ladle full, mixing as you go, until the rice is tender but with still a little bite to it-20 to 25 minutes usually is about right.
A good risotto should be moist and be able to slide off your spoon with ease.
Right at the end, add the honeycomb mushroom, extra butter, lemon zest and Italian parsley and mix well through.
Serve immediately with parmesan sprinkled generously over the top.

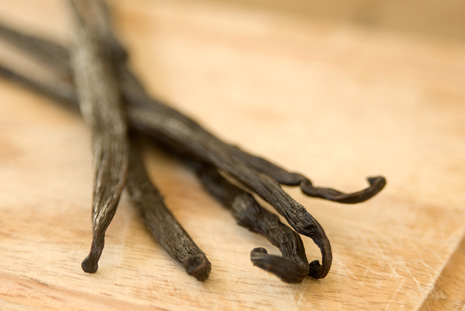
Vanilla – the King of Spices

  The King of Spices-Vanilla
Michal Haines

 Maybe it should be known as the Queen of Spices, but the little trick vanilla played on its own species is wonderfully elegant.

 Part of the largest group of flowering plants in the world, the vanilla planifolio, is the only one of its kind with edible fruit. Fruit that we know the taste of with such familiarity that in a blind test situation, it is chosen accurately 70% of the time. For the poor 30% who don’t recognise it, I suggest we can do nothing more for them.

The irony of this wonder plant is that it in order to have the honour of bearing edible fruit it has had to give up its aroma.

Almost totally scentless, vanilla must struggle along in its life being the bearer of taste without the intoxicating aroma that its fellow orchids can bring.


The Aztecs were fast to recognise its virtues and documentation of Cortes indulging in drinks of chocolate laced with vanilla and sweetened with honey in 1520 show they were already more than familiar with it. Cortes was particularly fascinated by how venerated vanilla was to the Aztecs. Considered the most feminine of foods, her abundance of seeds symbolised her fertility and her purity is represented by her sheathed calyx meaning accidentally fertilisation is impossible-another little trick of the plant.


Cortes returned to Spain with chocolate, introducing it as xocolatl , its original Aztec name. The black pod or tlilxohitl he had so fallen in love with returned to be introduced as the far more evocative vaina, from the Latin vagina.

The Spanish began importing vanilla around this time, establishing factories to manufacture chocolate flavoured with vanilla.

It became quite the ingredient back in the day, being heralded as an aphrodisiac and a stimulant and as usual, clever marketing made it something that one just couldn’t live without.


Unfortunately for humans, the propagation of vanilla outside of its natural habitat was very slow to take on. As early as 1733, plants were being raised but without success of fruit. It seemed that tender care and attention just wasn’t enough for the Queen of Spices.

It wasn’t until 1833 that a well known botanist worked out that pollination had to be undertaken by a very small sting-less bee, unique to the vanilla’s natural habitat of south east Mexico and Central America. No bee meant no pollination and no fruit. He devised a way to hand pollinate the vanilla to imitate the bee.

Hand pollination was undertaken using little spiked bamboo sticks and success was finally at hand. By the early 20th century, vanilla was being grown on Reunion Island, in Tahiti, parts of Africa and Madagascar. All plants were being fertilised in the same labour intensive manner using hand pollination. The very same method that is employed today.


This is a labour of love. Flowering takes place over two months at which time 50 to 150 selected flowers per plant will be hand pollinated and those successfully pollinated flowers will bear fruit within six weeks. It is another six to nine months before the green pods begin to yellow and are considered ready for harvesting. As the pods do not mature at the same rate, there can be a three month period of harvesting undertaken to get a full harvest.

The next stage involves kiln drying for up to twenty four hours in order for the natural enzyme vanillin to be produced on the surface of the pod itself.

Out into the sun they go for more drying and at the end of each day all the beans must be gathered together and wrapped up in blankets to protect them from the night air and moisture.

This continues for a period that can exceed six months before the pods are once again gathered together, graded and strung into bundles of 60-100 beans ready for export and further processing to make extract, sugar, pastes for the commercial and domestic markets.

By this time a single vanilla pod will have been handled up to 100 times.


The demand for vanilla over the centuries grew rapidly and inevitably the demand outweighed supply. Some clever scientist worked out that by taking the waste sulphite liqueur of paper mills and coal tar extracts they could make something that imitated real vanilla and called it vanilla essence. With the expansive growth of commercial baking and ice cream manufacturers, it seemed a sensible and price conducive thing to create rather than use the original. At one stage it even threatened the natural vanilla industry as more and more people chose the imitation over the real due to price, a sad inevitability but one so often seen when taste goes up against the dollar.

As consumers, remember the golden rule …..For better taste and scent, go for extract. Stay clear of essence.


Natural vanilla extract is made from soaking finely chopped cured vanilla pods in alcohol. A portion of the alcohol is then distilled leaving what we know as vanilla extract and around 35% alcohol.

Look out for those well labelled with 100% natural vanilla extract and some indication of alcohol content.


Vanilla pastes have become increasingly popular  but read the labels carefully as many contain dextrose or corn syrup, glycerine and added sugar. These can often be created from both the seeds and pod itself leaving you with a mixture that can be overly woody rather than floral in flavour due to the inclusion of the otherwise discarded pods.


Vanilla powder is another one to watch out for. Cheap versions are merely mixtures of powdered vanilla essence and sugar. Very rare are the formats that use the vanillin which naturally rises to the surface of the bean itself in the drying process and is scarped off and mixed with high grade natural sugars. A simple and tasty version is to simply scrape the seeds from one or two pods and mix them into good quality sugar to infuse.


To go one step further you can even rate your extract by where the vanilla has been grown.

Mexican vanilla held the monopoly for over 300 years and is still held in high regard as possessing the best flavour, albeit subtle in comparison with its cousins. Delicate top notes set this variety apart.

Bourbon vanilla comes from three main sources-Madagascar, the Comoro islands and Reunion. With a more pronounced body it is the preferred choice for those who are in the extracting industry.

Indonesian vanilla, until recently has been a mixed bag. Much of it is used in the production of syrups and higher quality artificial vanilla essence. Now more is being carefully handled and cured opening up another section of the market that may well prosper for top quality vanilla.

West Indian is a lower grade to Bourbon and is generally used for perfume production rather than culinary applications.

Tahitian vanilla is produced both in Tahiti and Hawaii. With low vanillin content and a taste that many official tasters do not rate at all, it is now becoming a new growth market for Tahiti. Often seen transformed into soaps, shampoos and hand creams for the tourist market, there are exceptions where small growers are taking total control to create beautiful quality vanilla.


Each variety has something to offer in the kitchen. Be it to infuse sugar for baking cakes and biscuits, infusing alcohol or making sauces for both sweet and savoury dishes, the vanilla bean truly is the queen of spices.


Marcel’s Hotcakes & Crepes

Marcel’s Hotcakes & Crepes

They look delicious, where can I buy them?


Van Dyck pre-cooked crepes and hotcakes are available nationwide, but depending where you live and what supermarket you shop at, they will either be in a Marcel’s branded pack or in an unbranded clear pack, or under the supermarket bakery brand.  To make it easy for you to find them, we will tell you where to look and under what brand.

If you shop at Foodtown, Woolworths and Countdown stores nationwide Marcel’s Hotcakes & Crepes can be found in the fresh bakery department, packaged under the bakery home brand Freshzone.If you shop at New World or Pak N Save in the upper North Island and South Island stores, you can find us in the bakery department packed in a clear plastic unbranded pack; for New World & Pak N Save in the lower North Island we are packed under the Marcel’s brand and found in the bakery department. Our product range is stocked in the freezer of specialty foods stores around New Zealand too.  Each store stocks different product choices from the range, including pre-cooked plain, sweet or gluten free crepes, hotcakes in plain, chocolate or blueberry and mini hotcakes.  Our very popular blinis, small Russian savoury pancakes, are used in place of a cracker, great for finger food and starters. 

Specialty food stores in Auckland include Farro Fresh Foods in Mt Wellington, Nosh Food Market in Glen Innes and Nosh Metro on Ponsonby Rd.  For gluten free crepes, try IE Produce Takapuna and Huckleberry Farms Greenlane. In the Wellington Region we are in Moore Wilson stores in Wellington city, Porirua and Masterton.

Serving suggestions: Every New Zealander loves pancakes for breakfast or dessert.  Serve hotcakes for breakfast with bacon, banana and maple syrup, or as a dessert with your favourite sweet topping.

Marcel’s sweet crepes are a thin, european style pancake; all you do is heat and serve.  Try lemon juice and sugar for tradition. Other popular fillings are berries and yoghurt, or fruit and ice cream.

Marcel’s plain crepes offer you a savoury option and can be filled with almost anything you like.  Try salmon, cream cheese and dill, or for the kids, fill with their favourite filling, roll and serve.

For those with special dietary needs, we also have gluten free crepes.  These can be used with either a sweet or savoury filling.

Mini hotcakes are great for children.  They come in packs of 24 and are perfect for lunchboxes.  These are great on their own or serve them with a healthy topping.

Blinis are superb for catering, finger food or parties.  Toppings are unlimited.

The best thing about Marcel’s pancakes is that you can be as creative as you wish.  They are convenient and versatile.  Use your imagination to create your own masterpiece.

For more information and recipe ideas visit http://www.marcels.co.nz/ retail brand or www.vandyck.co.nz foodservice brand.

Tomato Sauce – keeping kids sweet

Tomato sauce: Keeping kids sweet
Louisa Clery

 I recently read an article in a parenting magazine about a woman for whom cooking was once a joy. She’d spend a whole day making vegetable lasagne and all week preparing for impressive dinner parties. She was adamant that nothing would change once she became a mother. Then she had kids. Her culinary flare slowly faded as she left the land of ‘make it all yourself’ to become a refugee in the pre-prepared food aisle of her supermarket. The story ended, after years of being worn down by fussy eaters, with her daughter having a ‘nothing’ sandwich for tea. A piece of bread, in other words.

As a mother of three myself (the youngest only just reaching 4 years old), I can relate to the author’s sorry tale. Any sentence that starts “Mum, I don’t like…” is bound to steal a person’s culinary mojo.  And somehow they conspire to dislike different things on different days, so that just when you think you’ve found a dish that will please them all, one of them has a throw-back to the ‘time that Mum forgot’, when they hated pasta but loved avocado.

It’s not like I molly coddle them or give in to their finicky ways. I could leave a tape recorder on the kitchen benchtop and at tea time switch to a pre-recorded message (looped), leave the room and nobody would notice that I wasn’t there. The message would say “You don’t have to eat it if you don’t like it, but you’re not having anything else before you go to bed”. I would have the foresight to lock the fridge and cupboards before I left, of course.

 My middle son, aged 7, is probably the hardest to please. Not that he’s conventional in his tastes. He loves globe artichokes, but will only nibble on the leaves and leave the heart! He’ll eat carrot in his salad, but only if it’s peelings. He hates frozen peas, but loves wasabi peas. He even went through a phase where, after he’d finished his boiled egg, he’d eat his way through the eggshell. As you can imagine, it’s impossible to predict his reaction to any new dish.

 There is, however, one constant in our children’s ever-evolving tastes. Tomato sauce. I know it’s not clever nor in the least bit sexy, but I reckon it’s under-rated. It’s like that mate that you’ve known since you were two, and who is a wee bit boring, so that you kind of forget she’s there, but she never misses your birthday and you’d be sad if she was gone.

 Tomato sauce casts some sort of magic spell over children, compelling them to eat healthy food – or at least to lick the sauce off it. At our house, McMum burgers are generously slathered in sauce so that the boys barely notice the pickle and salad leaves. I use sauce to draw pictures on top of macaroni cheese and the kids try to guess what I’ve drawn (not an easy challenge given my art skills). No burrito is the same without a tomato sauce topping, and don’t even get me started on homemade sausage ‘hot dogs’! And while dipping raw carrots into tomato sauce may seem like a gastronomical gaff, it’s one way of fooling a toddler into experimenting with taste and texture.

 The great thing about tomato sauce is that as a parent, I can almost convince myself it counts towards the ‘five a day’. After all, if you’ve ever made our own you’d realise just how many tomatoes goes into producing a small bottle of sauce. But I’m a little suspicious about the shop bought stuff. On the label of the budget sauce that I’ve got in my cupboard, the first item on the ingredient list is water! And of course it’s much higher in sugar and salt than the recipe for my homemade sauce.

 So here’s the recipe I use when I have tonnes of ripe tomatoes in season, along with the nutritional information that I would have to put on the label if I was selling it. It is a bit of a bother making your own tomato sauce, but if you hunker down and make a huge batch, it’ll keep your kids sweet and your nutritional conscience clear. And now’s the best time, when sauce tomatoes are as cheap as the chips they complement so well.

 Tomato sauce

 I’d make a big batch of this in one go, upsizing the ingredients in proportion. Each kg of tomatoes produces around 500mls sauce, depending on how thick you like it.

 1kg tomatoes, chopped

1 small onion, sliced

25 grams brown sugar

1 cup vinegar (I use cider vinegar)

1 tsp allspice

1 tsp salt

1 tbsp paprika (or smoked paprika)

1 tsp white pepper

Simmer tomatoes and onions until soft. Push through a sieve back into a pot and add the sugar, vinegar, spices, etc. Bubble until quite thick, pour into sterilised bottles, and seal. If you don’t mind a more rustic sauce with seeds in, then just bung the whole lot in together at the beginning, simmer until thick and then blend and re-bubble before bottling.

Remember to stir the sauce to stop it sticking to the bottom of the pan, especially once it starts to get thicker!

Using the nutritional panel calculator provided by Food Standards Australia New Zealand, this recipe would produce the label below, if reduced to 500mls. The shop bought sauces in my cupboards have a sodium content of more than 1,200mg per 100g and a sugar content of between 19g and 25g per 100g.


Nutrient

Qty per 100g

Energy (kJ)

340.22

Protein (g)

2.94

Fat, Total (g)

0.64

Fat, Saturated (g)

0.07

Carbohydrate (g)

13.99

Sugars (g)

12.98

Sodium (mg)

407.63

Cooking with Lemongrass

The Lemon Weed
Michal Haines

 Lemongrass is one of those plants that it seems you cant kill. Ideal really for those with far from green fingers, it seems to stand down right hideous soil, high temperatures, and lack of water. I got mine from my mother in law who simply ripped some out of her coromandel soil and put into the boot of the car and now it thrives in my garden, growing taller by the second and being mauled by my intrigued cat.

 The Thais call it takrai, the Malay, serai and Vietnamese, Xi, it surprisingly enough it is grown in Israel, South and Central America, Africa, India and Australia as a cash crop. In Sri Lanka it is used merely as a wind break on tea plantations. Interestingly, it is grown in Thailand as part of an on going project to move farmers away from opium crops into sustainable farming with the government guaranteeing outlets for these crops.

Propagated just as my own plant was-detached pieces from an established clump and replanted, it seems to me that all cooks should have a wee clump in their kitchen garden to work with. The Thai people say it keeps snakes away so that has to be a good thing. Apparently it doesn’t like cold or too much wet but I haven’t seen any noticeable damage to my own plant during the cooler months.

 A replacement for the lack of lemons in South East Asia, it’s distinct flavour really cant be replicated. Intensely perfumed, tangy and on occasion bitter, it brings a zest to the traditional dishes of it’s home region.

 The preparation of lemongrass can be a little tricky but done once, you will know what to do. The flavour one gets from fresh as opposed to dried, shredded or even preserved in brine is far superior.

If you are simmering lemongrass in a dish such as a Thai inspired soup, pound the root end with a pestle or meat mallet to break up the cells and begin that flavour giving oil on the inside to begin doing it’s thing.

Add it to the liquid part to simmer away quietly and pick it out once you are ready to serve.

For a salad or dish that calls for sliced lemongrass, more preparation is needed.

Peel off the outer layers of flesh. These are very fibrous and can be very distracting to your diners when stuck in their teeth. The pale yellow lower portion of the stem will be very tender and easy to slice and is what you will be working with so cut the remainder off and either discard or freeze for adding a little flavour to soups, sugar syrups (great for cocktails!) or even infused sugars for baking.

Finely sliced, it will release those really intense oils and be soft enough to add to salads, pastes and stir fries.

The suggestion is made by some to try slicing it finely in your food processor but I either have a terrible food processor or just not the right blades as it doesn’t seem to work for me. It may be worth a go if you are working on a paste.

 When purchasing, look for leaves that are bright in colour and a bunch that has a good heavy weight to it. These are both indicators that the lemongrass is not dried out on the inside. Some of your outer leaves will be semi dried but stay clear off those that look really dry and old. Naturally, the older and drier they are the more fiborous it will be when you cut it making for an unpleasant eating experience.

Bunches will keep happily in your fridge for weeks or pop into the freezer, well wrapped for those times when you cant find any about at all.

 The Chinese use lemongrass to treat coughs and colds and through out Asia are used in baths to reduce swelling, improve blood circulation and treat wounds and cuts as an antiseptic. An aid to digestion and anti-flatulence, a simple tea of bruised lemongrass stalks steeped in hot water is very refreshing. 

In the West it has been adopted for similar uses due to its antiseptic nature in soaps, creams and lotions, even air sprays as fresheners. Aromatherapy oils combine it as a high note to help circulation and muscle tone but it is thought to help headaches and even to help as an anti-depressant, reducing lethargy and stress.

 On a finishing note, it is also closely related to the citronella family so as an oil, it works well as an insect repellent also.

 What a wonder herb giving us so much taste and aid in our lives!


Easy Tom Yam Goong

A classic of Thai cooking, this is fast to prepare, really simple and gives you a real boost on those days when you are feeling a little under the weather or run down.


Serves 4

1 litre water

300ml chicken or fish stock

4 kaffir lime leaves

4 stalks lemongrass, tops discarded and bruised

5cm piece of galangal or fresh ginger, sliced

16 large shelled prawns

4 bird’s eye chillies, chopped finely

2 limes, juiced

4 tablespoons fish sauce

2 stalks worth of coriander roots, well washed

Coriander leaves to garnish


In a large saucepan, heat the water and stock with the kaffir, lemongrass, galangal or ginger, chillies, coriander roots and fish sauce to a gentle boil.

Allow to bubble away quietly for at least 20 minutes.

Strain the soup, discarding all the bits and pieces and return to the heat adding in the prawns and the lime juice.

Adjust the flavour as needed adding a little more fish sauce for salt, a little more lime juice for sour or more chillies for spice. Cook for 2 minutes or until the prawns are cooked through then serve garnished with fresh coriander.


For more body, add a little coconut milk, rice noodles, a little pumpkin, …. Anything at all to help you feel revitalised.