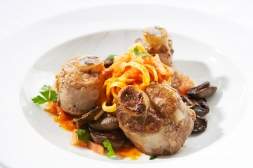
Cooking Veal

 Alison McKee

Veal was not included in my mother’s repertoire of dishes. It must have been widely available, despite it being unheard of in our house, as many early community cookbooks from the first half of the twentieth century and the ‘iconic’ Edmonds Cookery Book include several veal recipes, mostly for Roasted and Stuffed Veal Fillet or Veal and Ham pie.
Although the morality of veal production has been, and quite rightly, debated in the past there is a trend today towards more humane production. Veal has the least fat of all the red meats and is rich in vitamins and minerals particularly magnesium and zinc. Veal cuts mirror those of beef but are smaller, leaner and tenderer. Veal is best cooked medium, not rare, but care must be taken so it doesn’t dry out during the cooking process. Often recipes that are grilled or fried have an additional component of ‘fat’ added, such as prosciutto, bacon, butter, cream, cheese, ham or pork fat cut into lardons.
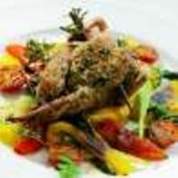
However, it’s not all bad! Classic dishes include Osso Buco (braised), Blanquette of Veal (stewed) and Vitello Tonnate (poached) – veal with tuna and anchovy mayonnaise. Veal racks are a relativity inexpensive cut when compared to lamb racks. Like lamb racks they are delicious with a herb crust. Add lemon zest for a ‘zing’ in your crust mixture and cut back on the butter by substituting a small amount of the butter for softened honey. Try serving the herb crusted veal racks with Porcini Oven Baked Risotto. For a further Italian inspired dish add chopped olives to Veal and Pork Mince meatballs.
Unfortunately I have no willpower and my favourite veal dish is Saltimbocca – escalopes of veal, sage leaves, prosciutto, copious amounts of butter and dry Marsala.

Porcini Oven Baked Risotto
Osso Buco
Tuna Mayonnaise

(Photography courtesy Gourmet Direct Ltd.)
Vegetable Soup

The past weekend has seen loads of snow falling around the country and although it would sound ridiculous to claim that Auckland was freezing it was certainly cool enough for some good old fashioned comfort food.

Vegetable soup is one of my favourite winter dishes.  Many recipes from mum have been adapted over the years but this one stays the same. It embodies the essence of my New Zealand childhood but while other recipes I now flavour enhance with more exotic herbs and spices this one remains exactly as it was.  I let the sweet gentle flavour of the vegetables blend into a calm and soothing soup.  To me this is the ultimate in comfort food and one that I can happily have for both lunch and dinner while it lasts.  Thankfully the rest of the family like it as well, Greta (12) had it for breakfast today before she went out to early morning netball.

My stock is always homemade or as close to homemade as I can get – For beef stock I slowly cook beef bones in the oven with chunks of onion, carrot, garlic, celery and a good smear of tomato paste.  The bones and vegetables are then transferred to a stock pot with water and simmered with a bay leaf and a sprig or two of thyme for 4-5 hours. 
There are a few good brands out on the market but to get a good natural taste I really believe that using good quality stock is essential.

While mum always uses barley with the introduction of quinoa I find it a great grain in soups.  Barley has a tendency to go a little furry whereas quinoa adds body in the most subtle of ways.  
I did say that I hadn’t changed the soup along the way but I do often vary the grain and I am sure if quinoa had been available when mum was my age she would have used it too! 
Ceres organic is the brand of quinoa that I buy – if you would like to try this then simply email me and you will be in the draw to win one of 5 quinoa packs from Ceres. [email protected]


Vegetable Soup


Boiled Eggs with Soldiers

Boiled Eggs with Soldiers – Alison Mckee

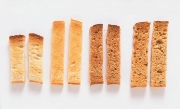
Be it fish pie or bread and butter pudding ‘comfort’ or ‘nursery’ food is constantly being reinvented and always fashionable. Soft-boiled or runny ‘Egg and Soldiers’ is just one of those dishes that, for me, brings back memories of childhood and is now appearing on menus, and not just on the children’s menu, at local cafés along with all time favourite ‘mince on toast’.

There are several explanations as to how ‘Soldiers’ gained their name. One is obviously that they are cut soldierseven and straight – lined up like a row of soldiers standing to attention on your plate. There is a further suggestion that they represent the ‘all the king’s men’ that couldn’t put Humpty Dumpty together again. One café horrifying invites you to dunk your bread in Humpty’s head! It is generally accepted that ‘Egg and Soldiers’ is English in its origin.

The debate is, however, should the bread be toasted or not? In the Middle Ages ‘Sops’ or pieces of bread were used to soak up the liquid mixtures of many dishes, often they were first toasted to reduce their tendency to disintegrate. Connoisseurs of ‘Egg and Soldiers’ insist the bread, regardless of whether it be white, wholemeal etc., be toasted for this very reason.

Like all recipes ‘Egg and Soldiers’ have been adapted over time, ‘Soldiers’ have been toasted, un-toasted, buttered, unbuttered, smeared in Marmite/Vegemite or cheese or both. A British inventor has even designed a toast ‘Soldier’ device that when pressed against a slice of bread creates a series of precisely placed perforations. Once the bread has been toasted to perfection, the soldiers can be torn off ready for dunking.

The perfect measurement for a ‘Soldier’ is apparently 22mm wide. Twists on this classic and simple dish include toasted parmesan dusted ‘Soldiers’, melba toast with cracked black pepper, dukkah sprinkled over the egg, pre-purchased breadsticks wrapped in Parma ham, topping the runny egg with pesto, cumin infused oil or toasted sesame seeds and tossing out the ‘Soldier’ altogether in favour of a freshly steamed asparagus spear or a skewer of roasted salmon.

Basil Pesto
Rocket Pesto
Walnut and Almond Pesto
Dukkah

Roast Game Birds with Rosehip and Apple Jelly


 Roast Game Birds with Rosehip and Apple Jelly – Alison McKee

Between the 13th century and the French Revolution thousands of colombiers or pigeonniers were built in France. The right to own pigeons was a great sign of status and authority granted only to landowners as pigeon was considered one of the most delectable meats. The number of pigeons allowed was directly related to the number of hectares owned which determined the size of the pigeonniers. Pigeons and Quail are readily available at specialist stores and butchers. Both can be slightly dry when cooked so the addition of fats and juices is essential. Vine Roasted Quail with Barley Stuffing

Ensure the birds are thawed completely before cooking. Wash them inside and out and then dry with kitchen paper. The birds should be at room temperature before cooking.

Roast Pigeon
One Pigeon per serving
A knob of butter
1-2 Rashers of Streaky Bacon to cover

Preheat the oven to 190º C
Place the knob of butter inside the pigeon. Cover the pigeon breast with the bacon rashers. Season. Place on a rack in a roasting tin and roast for 15 minutes.
Remove from the oven, take the bacon rashers off and return the bird to the oven. Roast for a further 10-20 minutes. According to Mrs Beeton pigeon should be served with Bread Sauce

Roast Quail
2 quail per serving
Melted butter
2 Slices of Pancetta

Preheat the oven to 190º C
Wrap the quail in pancetta and baste with the melted butter. Season and place in a shallow roasting dish. Roast for 15-20 minutes, basting frequently.
For additional flavour fill the cavity of the quail with ‘woody’ herbs such as rosemary or thyme.

Who can forget in Like Water for Chocolate, Tita’s Quail in rose petal sauce that caused everyone to become suffused with passion? For centuries, roses have been used as an integral ingredient in creating the finest culinary dishes. In medieval times roses were used extensively in fish dishes and game sauces as well as sweet dishes. If you haven’t yet pruned your roses now is the perfect time to make Rose Hip Jelly. The best roses to use are Rugosas despite them having fierce prickles they produce wonderful edible hips.

Rose Hip and Apple Jelly
8-10 Granny Smith Apples
8 cups rose hips cut in half

Coarsely cut the apples, including the core and seeds and place in a saucepan with the rose hips. Cover with water. Bring to the boil and simmer approximately 20 minutes until the apples are soft and pulpy. Place the pulp in a sieve and mash until only the skins and seeds remain. Strain through a jelly bag. Do Not Squeeze or the jelly will not be clear. Allow 1 cup of sugar to each cup of juice. Place the juice in a nonreactive saucepan and bring to the boil. Add the sugar and boil quickly about 20 minutes. To test: place a small amount of jelly on a cold plate to cool – if it jellies it is ready. Skim off any foam and ladle carefully into hot sterilised jars.

Roasted Little Birds With Walnut And Almond Pesto
Roast Pheasant With Quince Paste
Duck Breast With Sautéed Red Cabbage, Walnuts And Kumara

Cooks Knives

I know being a semi proffessional cook that I should have a good selection of quality knives kept in a good condition but to be honest mine are anything but!
Everytime I do a photo shoot my stylist reminds me just how appalling my knives are.
New sharp knives do not generally cause injury, it is those that are blunt and not cared for and then you use extra pressure to chop and before you know it you have cut a finger or worse.
Today I took my very blunt knives – all 2 of them, I work with a 20 cm chef’s knife and a long carving knife – to the sharpeners.  I positively crept into the store and shamefaced handed over my knives, silently urging the girl behind the counter to quickly take them out the back.

My impulse to get my knives sharpened today was somewhat irrational, being the start of a long weekend and if I decide to cook anything that requires more than a ham or bread knife then I don’t have it.  Perfect justification for a new purchase!  I must admit that conservatism ruled and when I asked the price of a 15 cm utility knife although it looked quite small and I found out I had already reached $100 I decided that it would in fact do very nicely to carve the lamb we are likely to have on Sunday.

I was then reminded of an article I read a while ago which suggested that if you were not vigilant at keeping your knives well sharpened then perhaps you were better to buy cheaper knives from discounted stores and use them until they won’t work anymore, toss them out and start again.  Somehow this seems too wasteful and I would rather stick to buying once and buying well.
Brands such as Felix Solingen or Wusthof are great, while there are certain technical details which constitute a good knife, in the end it comes down to personal preference in terms of weight and style.

My new knife is fabulous which has shamed me even more.  From now on things around here are changing and I am going to give my knives the respect they deserve.

New Zealand Bacon

Last Friday I flew to Wellington to be a judge at the inaugural Lesnies 100% New Zealand Bacon Competition.
The criteria for entry was that the bacon be New Zealand Pork.
While this may seem logical unfortunately it did prohibit some of the big commercial companies from entry! 
For those that wonder why the emphasis on NZ reared pork – aside from the obvious of supporting a local economy there is also the animal welfare issue which in other countries may not be as stringent as NZ and also imported pork could contain growth hormones.  Growth hormones are not used in NZ.

NZ Pork have released stickers for companies to label their bacon and ham NZ Pork, they assure also that they will be auditing the companies using these stickers to ensure that they are sound.

Back to tasting bacon – 233 in all and divided into 4 categories of middle, shoulder, streaky and danish.
We looked, poked and prodded 2 rashers of each bacon in its raw state and then got to sniff, poke and taste it once cooked.  After counting that our table were tasting over 20 bacon samples I realised I would in fact have to chew and spit – not quite as elegant as it is with wine tasting :)

The level was fantastic and there was such a range of bacon available.  Personally I favoured those with a good crisp rind and a lovley smoky bacon flavour.
I did have a problem with a couple of samples that had taint – an unpleasant odour that is most commonly detected by women and Asian people.   Funny that men can’t seem to pick it up – being the only female at our table I was on my own a bit with that one but it was only a few samples. 

Overall top bacon went to Heller Tasty from Christchurch with it’s Danish Bacon.
The top midle bacon went to  Murchison Meats, Murchison,  Elite Meats won the Shoulder bacon and Franklin Country Meats from Pukekohe won the Streaky. 

Heller Tasty Danish – Heller Tasty
 

Middle Bacon

Gold Murchison Meats, Murchison

Silver Goodman Fielder, Auckland

Bronze Bream Bay Butchery, Ruakaka Town Centre

Shoulder Bacon

Gold Elite Meats, Christchurch

Silver A E Preston, Wellington

Bronze Allenton Meat Centre, Ashburton

 Streaky Bacon

Gold Franklin Country Meats, Pukekohe

Silver Peter Timbs Meats, Christchurc

Bronze Verkerks Pancetta, Christchurch

Danish style Bacon

Gold Heller Tasty, Christchurch

Silver Buzz the Butcher @ Westown, New Plymouth

Bronze Pork n Poultry. East Tamaki, Auckland


Winter Pudding Recipes

Puddings Back in Style – Tammy McLeod
When it comes to something sweet to eat after a meal in winter, the word pudding conjures up delicious, hot, tummy filling food. As children we had pudding with dinner most nights – more often than not it was simply ice-cream and tinned fruit, but I do have fond memories of Mum’s fruit sponge, steamed golden syrup pudding and of course chocolate self-saucing.

These days pudding is more of an occasional treat rather than every night. Even the word “pudding” has been superseded by the word “dessert”. But I prefer the word “pudding” and the old fashioned favourites are still the ones I like best.

The great thing about puddings is their versatility. They are quick to make and you can dress them up or down through presentation and variation to make them equally suitable for a mid week family meal or a planned dinner party. The easiest way to dress up a pudding is to make individual servings in small ramekins. These always look impressive, as though you have gone to a lot more trouble than you actually have. Adding the seeds of a vanilla pod, or vanilla paste to whipped cream is also a great way to turn simple cream into a classy accompaniment.

Here are a couple of my favourite simple puddings which can be made that bit more styley by using the above techniques.

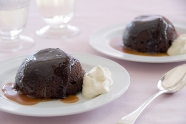
Chocolate self saucing pudding is a perennial favourite. I bake it in individual ramekins and make the batter and sauce using dutched cocoa for extra depth and richness. I also add chunks of dark chocolate to the batter which gives the occasional spoonful of molten chocolate. I like to serve this with natural yoghurt to cut through the richness of the pudding.

Rice pudding is a much overlooked pudding. Once again, it is nice served in individual ramekins, but a large dollop of rice pudding can look equally impressive in a lovely serving bowl. I prefer to make my rice pudding on the stove top as I don’t like the skin that forms when baking it in the oven. Another nice thing to do is to stir through small chunks of quince paste or your favourite jam. Served with lightly whipped cream flecked with vanilla seeds or lightly poached fruit and syrup, rice pudding can be the star of any dinner party and can be served hot or cold.
Apple Roly Poly
Chocolate Bread and Butter Pudding
Butterscotch Self Saucing Pudding
Caramelised Apple Bread and Butter Pudding
Golden Dumplings
Pear and Ginger Crumble
Rhubarb and Apple Crumble
Rice Pudding with Quince Paste
Rice Pudding
Sticky Date Pudding
Tamarillo and Banana Pie
White Chocolate and Rum Rice Pudding

Kid’s Birthday Parties

Jemima was 5 on Monday and as usual we had a rather large party for her friends, siblings and parents on the Sunday afternoon.  For the first few birthday parties I served loads of sweets and treats and shrugged that birthdays only come once a year.  However, little did I realise that Miss Sociable could end up with 5 invitations in the same week which has the potential for an overload in “treat” food as she had for the week prior to her own celebration.
Having also just interviewed Michael Pollan the day before the whole real food issue was sitting in my head.  So, the challenge I threw myself was how to have a fun party but not do an excess of “rubbish”.
and to get kids to actually eat some reasonable food.

Lunch was served on picnic rugs on the lawn and was all savoury.  A near table was set up with mugs of water.
homemade sausage rolls
garlic bread
homemade pizza
cherrios (hmm)
chicken pieces
pineapple and mandarins

After kids had time for second and thirds we lit the candles and did the cake.  This I had made using the gingerbread template from www.chefstoolbox.co.nz 

Cake was followed by hokey pokey icecream in cones and then a pinata which had two wrapped chocolates each.
So while there was definitely an element of the unhealthy I was really pleased with the balance.

Eating Real Food

Yesterday I had the privelege of attending a lunch at Soul in Auckland where Michael Pollan was guest speaker.  I have previously read his book The Omnivore’s Dilemma which was incredibly thought provoking and I have just started his latest book In Defence of Food.
Michael in his own words is a naturist before food writer and his connection with food is based on the way our food choices impact on nature.
Some thought provoking comments that I took the time to write down from Michaels talk include:
* His 7 word thoughts on eating – Eat food, not too much, mostly plants.
* Don’t eat anything your great grandmother (or anyone elses great grandmother) didn’t recognise as food.
* Nutritionism divides the world of food into “good and evil” and constantly changes their thoughts over time.
* One of the most important votes you can cast is the one you make with your fork on a daily basis.
* Eating used to be a normal activity, now it seems we need experts to tell us what to eat.
* Agriculture changes the species existing in the world.
* Don’t eat anything incapable of rotting – with a few exceptions like honey.
* Do your shopping around the outside of the supermarket without spending too much time (or money) within the aisles.

I think these points are very thought provoking and it seems that we are straying so far away from real food that we need to be reminded to think before we eat.
What do others think?

Cooking Wild Duck

While I was sitting back enjoying gorgeous food and wine at Savour New Zealand, Ed was sitting in a maimai aiming a gun at ducks.  I generally pay very little interest in this as the thought of shooting and perhpas maiming ducks or leaving a mate without a partner gives me the chills.  If I had to kill my own food I would be a very happy vegetarian.
Due to the stormy weather there was some reluctance to sit and pluck ducks so instead I was presented with a bag of duck breast fillets.  I should probably feel grateful for that as this is the first year in 10 that anything has come home at all!
Fillets without skin and thus fat lend themselves to braises and the duck ragout recipe from Al Brown looks really good so I cooked a variation on this.
It realy was delicious, beautifully rich but not overly so.  I did shred some of the duck meat at the end of cooking.  I found the large pieces a bit too livery for my taste but Ed and his mum didn’t agree at all.  Creamy mash and wilted spinach were perfect accompaniments – as was a good bottle of red!

Duck Ragout

2 tablespoons olive oil
3 rashers streaky bacon, chopped
1 onion, finely chopped
2 medium carrots, chopped
1 stalk celery, sliced
1 tub swiss brown mushrooms, halved
1 cup red wine
300 ml good quality chicken stock
600 g wild duck breast fillets, sliced into fingers (skin off)
3 fresh bay leaves
6 fresh sage leaves
3 sprigs thyme
kneaded butter for thickening

Preheat oven to 140 C.
Heat the olive oil in a cast iron casserole and gently cook the bacon, onion, carrot and celery until the onion is tender.   Increase the heat and add the mushrooms, tossing for a minute or two.  Pour over the red wine and allow to boil and reduce by half.  Add the chicken stock, duck fillets and herbs.  Season to taste with salt and freshly ground black pepper.  Cover and place in the oven, cook for 3 hours, checking on liquid levels at times.
Thicken sauce with butter kneaded with flour.

Serves 4


Verjuice

green grapesVerjuice – Alison McKee
Verjuice, the juice of unripe grapes, was first produced in New Zealand in 1997 and is now produced in most winemaking regions prior to the annual harvest. Unlike wine Verjuice is not fermented and therefore contains no alcohol. It must be refrigerated after opening.

Usually produced from specially grown unripe grapes Verjuice can also be made from crabapples, sorrel, gooseberries, or any other sour item according to the season. It has a complex taste.There is the intense fruity flavour we associate with wine but with a slight medicinal undertone and a bite. Although it is acidic, verjuice is not as intense as vinegar. Because of these in between qualities – not quite wine, not quite vinegar – verjuice is an intriguing substitute for both of these staples. It works particularly well when the oil or butter in a dish needs to be balanced with a strong flavour that has a delicate edge.

Verjuice tends to be associated with ancient European cookery however it is still common today in Middle Eastern recipes, particularly Iranian dishes. In many ancient cookery books verjuice appears as verious, v9ions, v9ious, v-ions, v9iaws, vergeous and veriows. In Italian cookery verjuice is described as agresto, agresta – meaning wild, pertaining to the fields. Early Roman recipes include the addition of beaten egg yolks, spices- such as cinnamon, ginger, cloves and saffron, – and verjuice. By the early 19th century Verjuice began to lose favour, along with the heavy use of spices as fresh natural flavours became prized.

The revival of Verjuice in modern cookery is largely due to the efforts of researcher Barbara Santich and of course Australian Maggie Beer. Verjuice has an affinity with duck, chicken, fish and makes a fantastic dressing – remember to alter your oil to Verjuice ration as Verjuice is not as acidic as vinegar. A squeeze of lemon juice also adds to the lemony tartness of the Verjuice. Try freezing Verjuice, especially Cabernet Sauvignon, as granita or if you are more adventurous freeze Verjuice chilli dressing and shard onto fresh oysters still on the shell.

For more information on Verjuice refer to Maggie Beer’s comprehensive book Cooking with Verjuice.
Recipes using verjuice on foodlovers include
poached pears in verjuice
sticky fruit with verjuice

salad of baby spinach leaves, chicken livers and oven dried grapes
verjuice and walnut oil vinaigrette
walnut and almond pesto

Foodlovers recommends you try verjuice from thevineco, made in Hawkes Bay by Alison & Dave McKee

Jam Making

Jam Making – Tammy McLeod

I never really liked jam, until I discovered that home made jam has a very different taste to the store bought product. Jam making is something I began about five years ago, my first attempt being feijoa jam after I was given a large bag of feijoas from a friend’s tree. That first experience was interesting! The jam had good flavour, but I over-cooked it and it was a bit chewy rather than jammy!

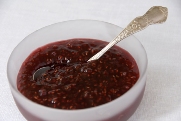
But, not one to be defeated, I persevered. My next jam making was quince, then rhubarb and vanilla, plum jam and so on. Now I have a few standards that I make every year, but I have also started branching out, creating my own recipes. This year I tried blackcurrant jam and blackberry jam, both using frozen berries, which is a really economical way of doing it and it means you can enjoy fresh jam all year round.

There are a few tricks to making jam. One is to make sure that you are using good quality fruit. Often people make jams and relishes with leftover fruit that is starting to go bad. Fruit which is more ripe does add a lot of flavour, but you also need firm fruit to make sure that there is enough pectin in your jam – pectin is what makes the jam set. A combination of ripe and firm is a good way to go. Secondly, it is better if you make jam in small batches. 500grams to one kilogram of fruit is usually the right amount. Too much fruit can mean it is difficult to fully dissolve the sugar before the fruit starts to boil. This results in a grainy jam.

Testing that the jam is set can be a bit tricky. When I start making my jam, I put a saucer in the freezer. I start to test it when the jam forms large drops when dripped off a spoon, by putting a teaspoon of the jam onto the cold saucer and popping it back in the freezer for about 30 seconds. If you can make a track through it when you drag your spoon (of finger!) through the jam, it is ready. Different fruit takes different times and it can vary from batch to batch. You can also use a sugar thermometer to test the jam – when it reaches 105 degrees celcius, it should set. If you find that your jam hasn’t set, you can pour it out of the jars and re-boil it until it reaches setting point.

Home made jam is simple to make and it tastes so good – like real fruit! It is great on toast or crumpets, but it is also great to use in home baking. Try one of the following recipes, substituting different jams to get different results:

 Rhubarb and Vanilla Jam
Jam Drops
Quince Jam
Belgian Slice